실습 환경 배포
필수 세팅
# Install Kind
brew install kind
kind --version

# Install kubectl
brew install kubernetes-cli
kubectl version --client=true

# Install Helm
brew install helm
helm version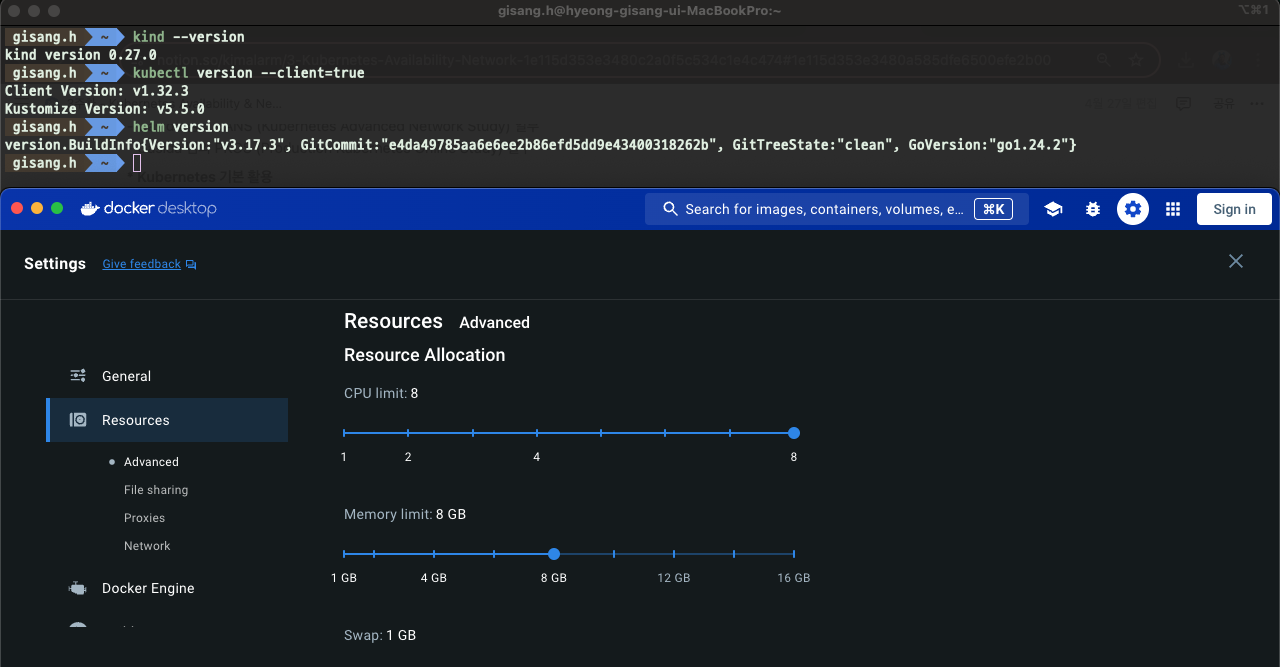
Docker Engine Resource
- vCPU 4
- Memory 8GB
kind 및 툴 설치
kind 기본 사용 - 클러스터 배포 및 확인
# 클러스터 배포 전 확인
docker ps

# Create a cluster with kind
kind create cluster

# 클러스터 배포 확인
kind get clusters
kind get nodes
kubectl cluster-info
# 노드 정보 확인
kubectl get node -o wide

# 파드 정보 확인
kubectl get pod -A
kubectl get componentstatuses

# 컨트롤플레인 (컨테이너) 노드 1대가 실행
docker ps
docker images
# kube config 파일 확인
cat ~/.kube/config
혹은
cat $KUBECONFIG # KUBECONFIG 변수 지정 사용 시
# 클러스터 삭제
kind delete cluster

# kube config 삭제 확인
cat ~/.kube/config
혹은
cat $KUBECONFIG # KUBECONFIG 변수 지정 사용 시
쿠버네티스 가용성
쿠버네티스 가용성 확보를 위한 다양한 방법
쿠버네티스의 가용성을 확보하기 위한 다양한 방법
- HPA (Horizontal Pod Autoscaling) : Pod 수평 확장 (스케일 In - Out)
- VPA (Vertical Pod Autoscaling) : Pod 수직 확장 (스케일 Up)
- CA (Cluster Autoscaling) : Node 확장 (Cloud 환경)
- Metrics Server 설치
- Kubernetes 에 내장된 확장 파이프라인을 위한 컨테이너 지표 수집 서버
- Kubelet 의 지표를 수집하고 노출하여 API Server 에 전달
- HPA, VPA 같은 자동 확장 사용 목적 (모니터링 솔루션 X)
# Metrics Server 설치
kubectl apply -f https://github.com/kubernetes-sigs/metrics-server/releases/latest/download/components.yaml

# Metrics Server SSL 무시
kubectl patch deployment metrics-server -n kube-system --type=json \
  -p='[{"op": "add", "path": "/spec/template/spec/containers/0/args/-", "value": "--kubelet-insecure-tls"}]'

# Metrics Server 배포 확인
kubectl get pods -n kube-system -l k8s-app=metrics-server
# 쿠버네티스 리소스 자원 사용량 확인
kubectl top node
kubectl top pods -A

# CPU, Memory 내림차순
kubectl top pods -A --sort-by=cpu
kubectl top pods -A --sort-by=memory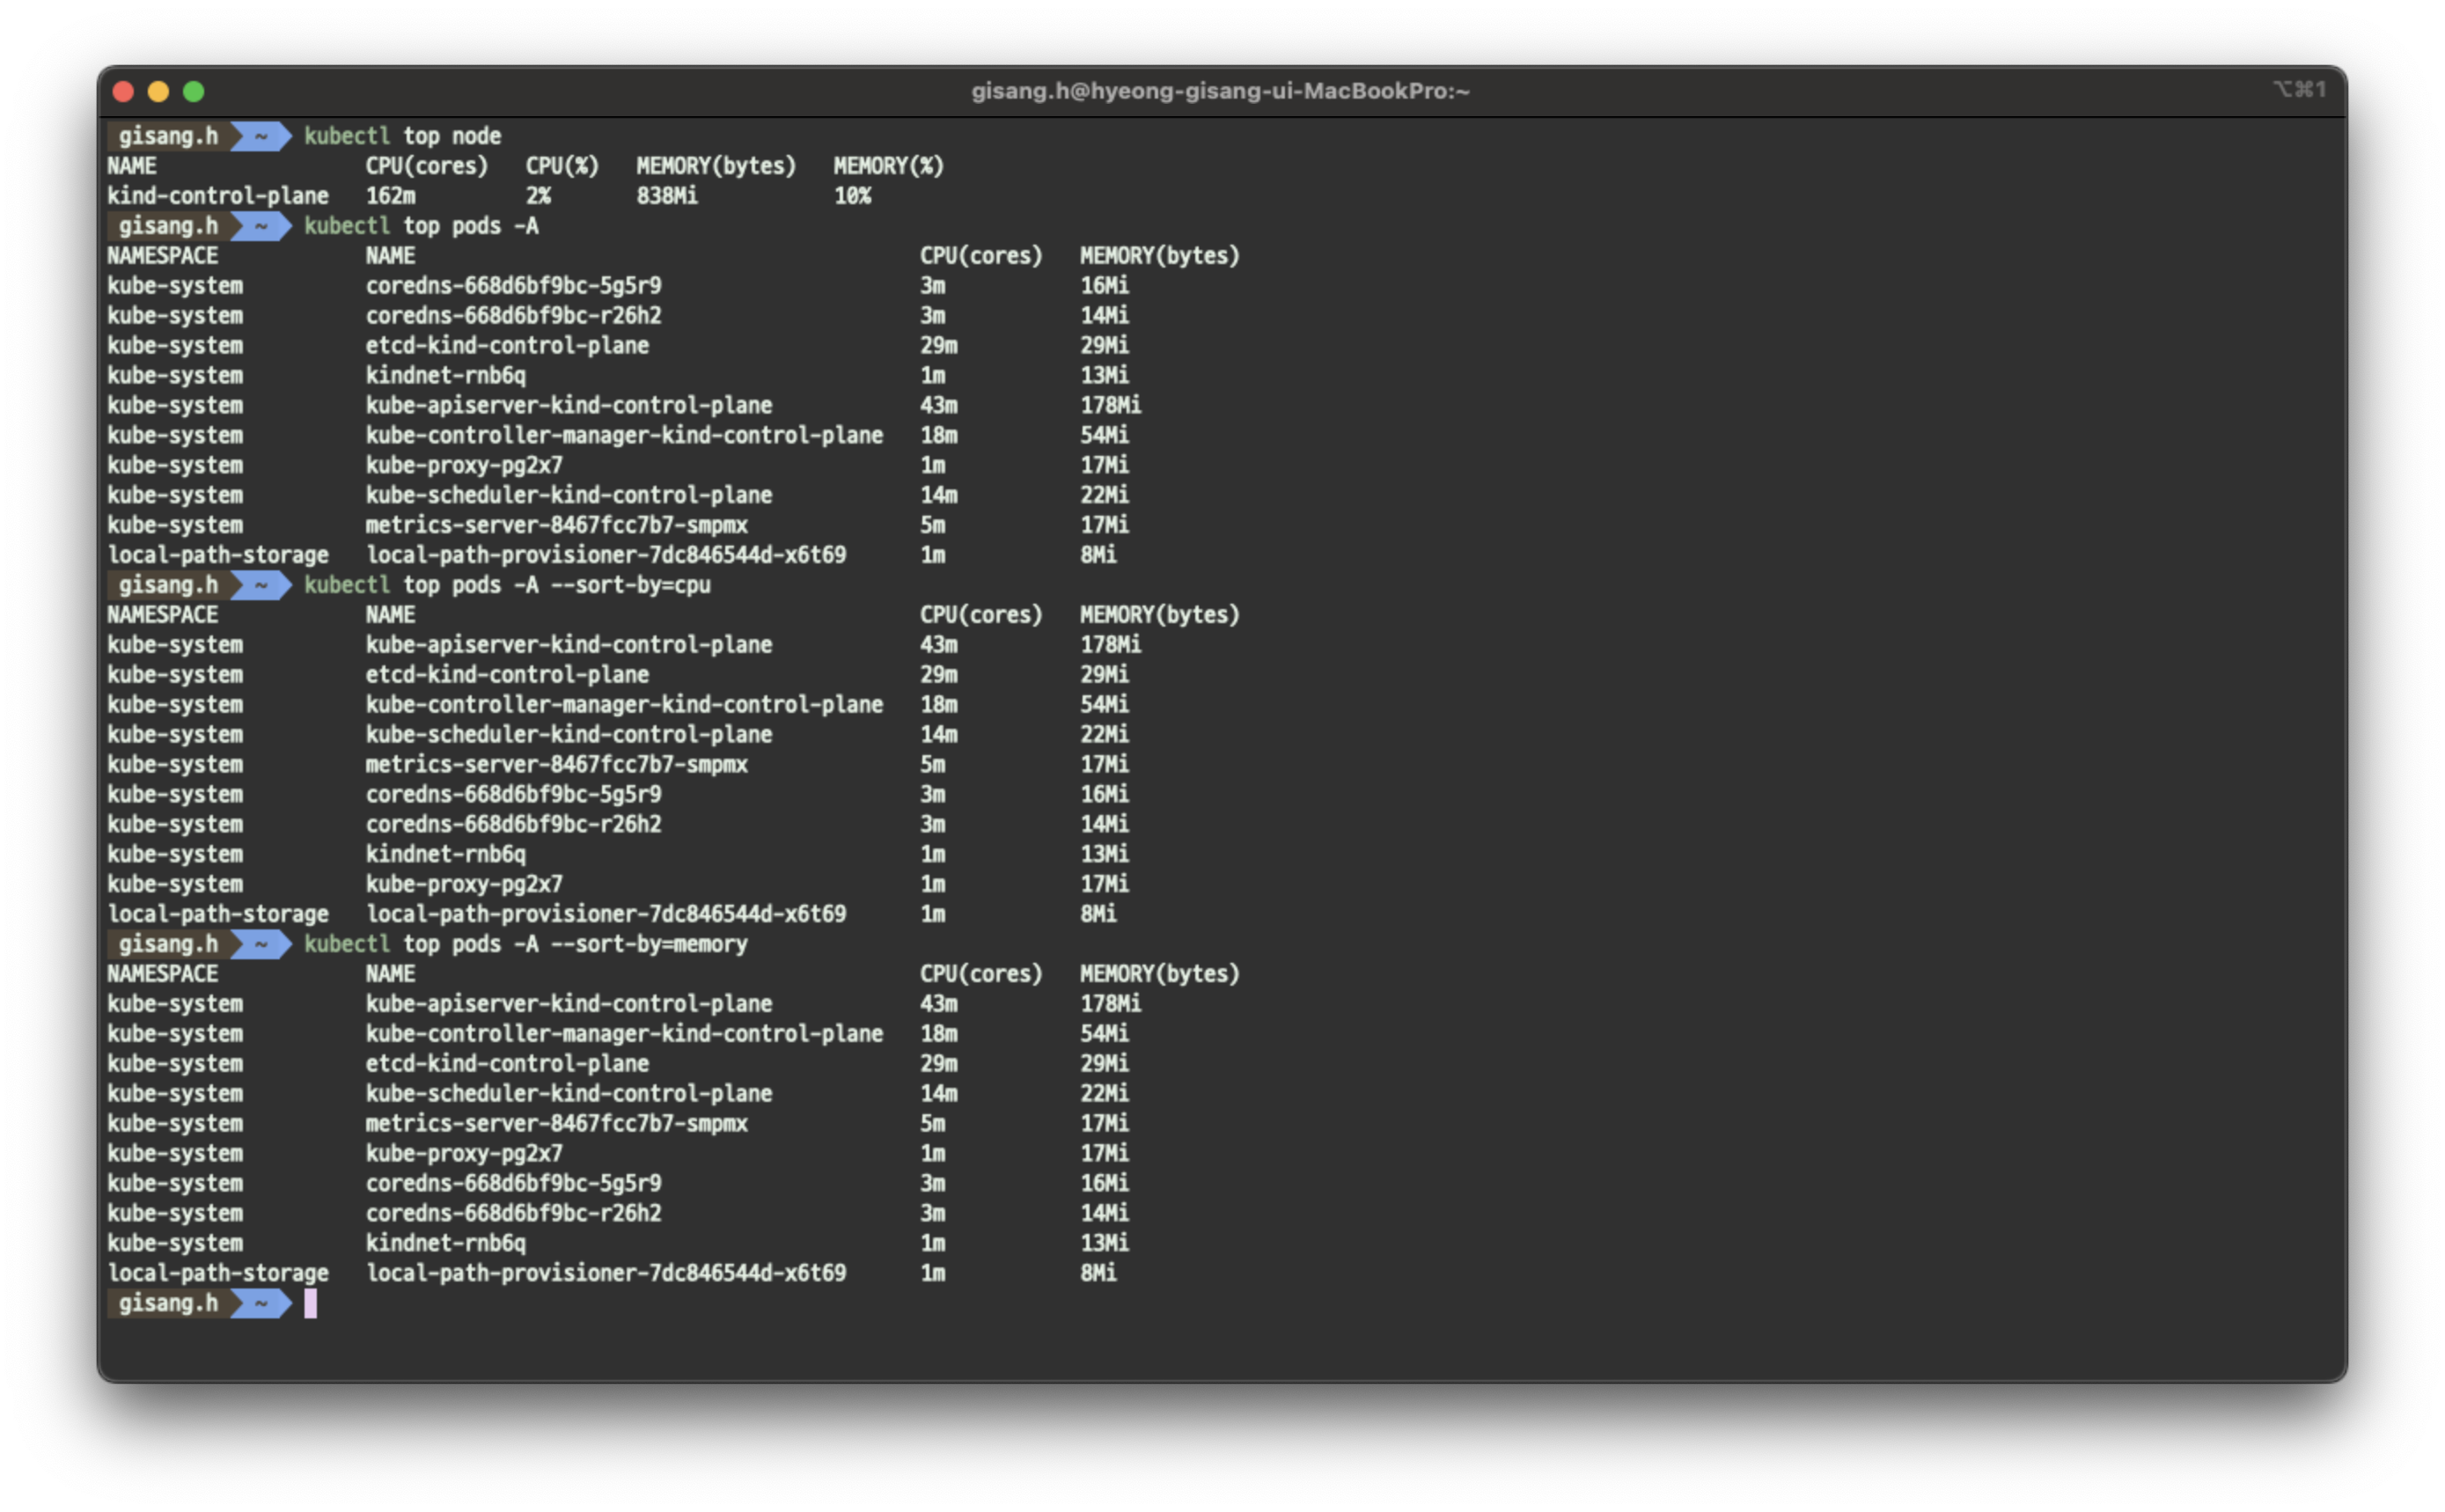
HPA
수평 스케일링(Horizontal Pod Autoscaling)
- 애플리케이션 부하(Load)에 따라 Pod 개수를 자동으로 늘리거나 줄이는 기능
- 모니터링 대상: CPU, Memory, 사용자 정의 지표
- Metrics Server 가 감시한 지표를 활용하여 설정된 임계치를 초과하면 Replica 수 조정
- 기본 구성
apiVersion: autoscaling/v2
kind: HorizontalPodAutoscaler
metadata:
  name: hpa-sample
spec:
  scaleTargetRef:          # Scale 타겟 지정
    apiVersion: apps/v1
    kind: Deployment
    name: my-app           # Deployment 이름
  minReplicas: 2           # 최소 Pod
  maxReplicas: 10          # 최대 Pod
  metrics:                 # Scale 기준 지표 설정
    - type: Resource
      resource:
        name: cpu
        target:
          type: Utilization
          averageUtilization: 50  # CPU 사용률 50% 기준
    - type: Resource
      resource:
        name: memory
        target:
          type: Utilization
          averageUtilization: 70  # 메모리 사용률 70% 기준
HPA 구성
- Deployment 배포
cat << EOF >> hpa-nginx.yaml
apiVersion: apps/v1
kind: Deployment
metadata:
  name: hpa-nginx
spec:
  replicas: 1
  selector:
    matchLabels:
      app: hpa-nginx
  template:
    metadata:
      labels:
        app: hpa-nginx
    spec:
      containers:
      - name: hpa-nginx
        image: nginx
        resources:
          requests:
            cpu: 50m
          limits:
            cpu: 100m
        ports:
        - containerPort: 80
---
apiVersion: v1
kind: Service
metadata:
  name: hpa-nginx
  labels:
    app: hpa-nginx
spec:
  ports:
  - port: 80
  selector:
    app: hpa-nginx
EOF

cat hpa-nginx.yaml

# Deployment 배포
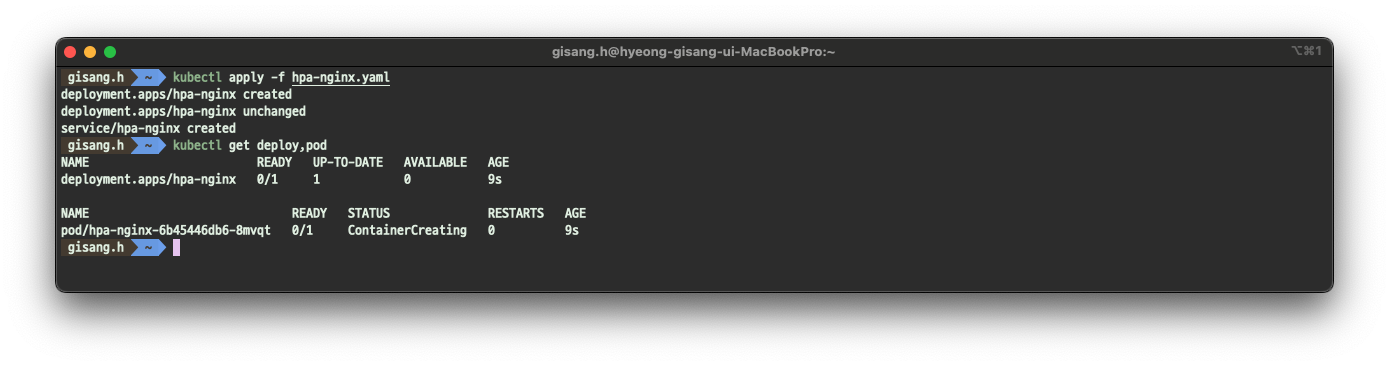
kubectl apply -f hpa-nginx.yaml

kubectl get deploy,pod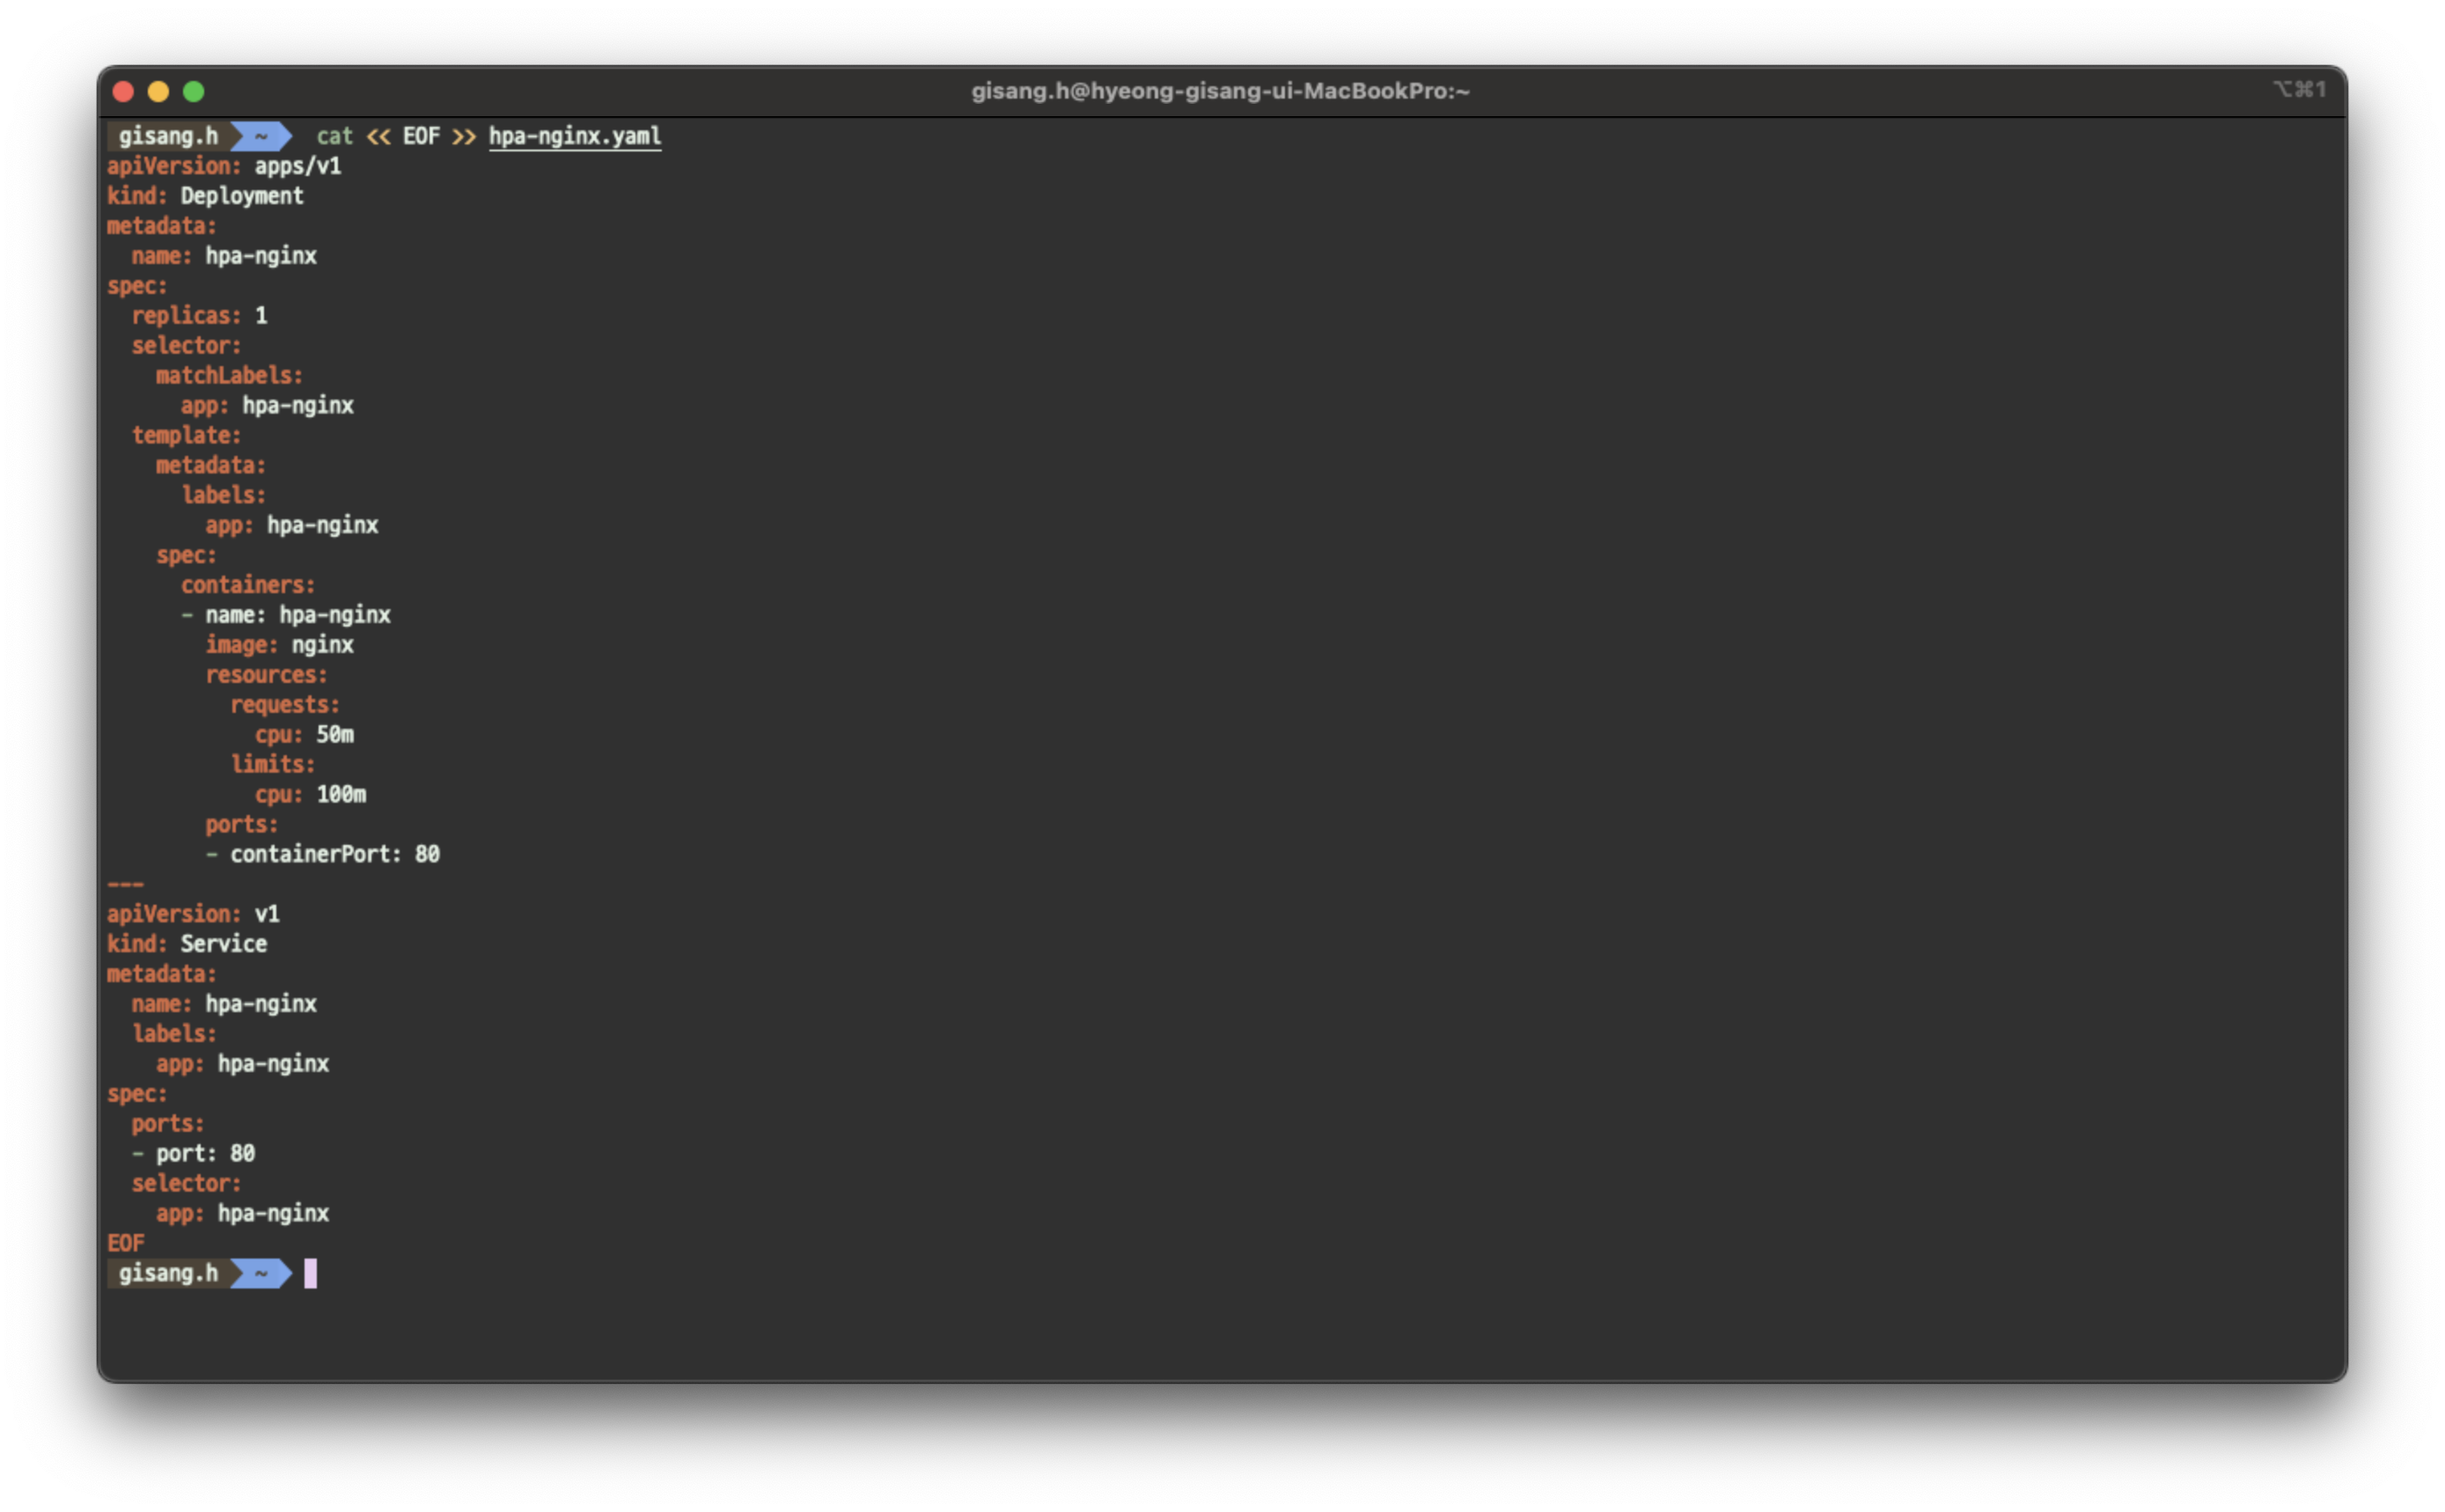
- HPA 구성
# HPA 생성
kubectl autoscale deployment hpa-nginx --cpu-percent=50 --min=1 --max=10

# HPA 확인
kubectl get hpa
...
NAME        REFERENCE              TARGETS       MINPODS   MAXPODS   REPLICAS   AGE
hpa-nginx   Deployment/hpa-nginx   cpu: 0%/50%   1         10        1          17s
....

# HPA 상세 정보 확인
kubectl describe hpa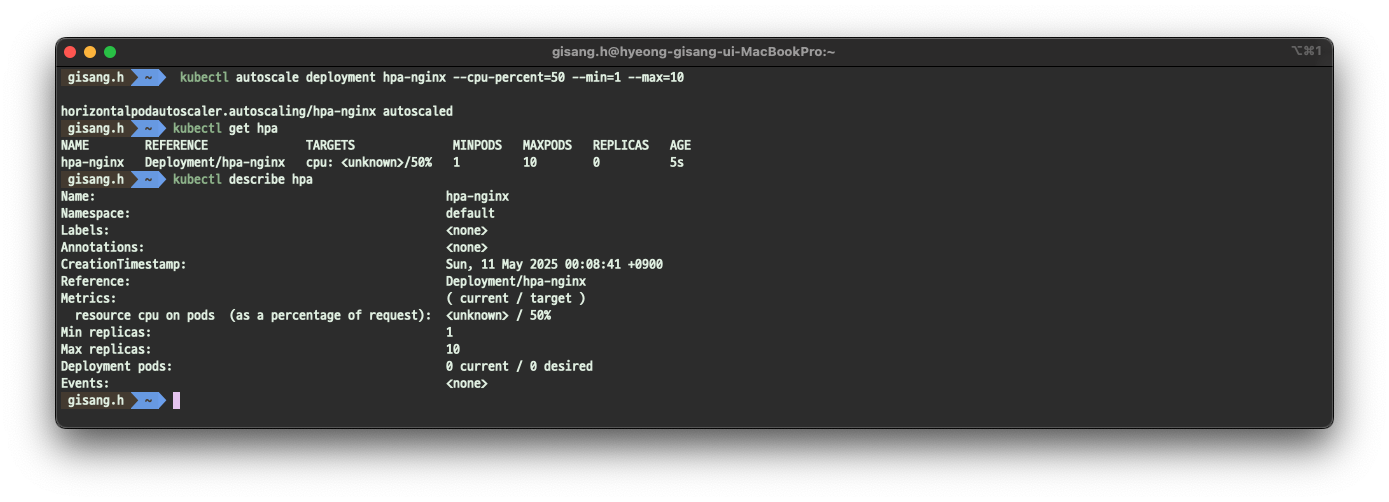
- yaml 형태(kubectl get hpa -o yaml) 출력
apiVersion: v1
items:
- apiVersion: autoscaling/v2
  kind: HorizontalPodAutoscaler
  metadata:
    creationTimestamp: "2025-05-10T15:08:41Z"
    name: hpa-nginx
    namespace: default
    resourceVersion: "1262"
    uid: 5ffd1aa2-b1e0-4462-93b0-2273543e5dd3
  spec:
    maxReplicas: 10
    metrics:
    - resource:
        name: cpu
        target:
          averageUtilization: 50
          type: Utilization
      type: Resource
    minReplicas: 1
    scaleTargetRef:
      apiVersion: apps/v1
      kind: Deployment
      name: hpa-nginx
  status:
    conditions:
    - lastTransitionTime: "2025-05-10T15:08:56Z"
      message: recent recommendations were higher than current one, applying the highest
        recent recommendation
      reason: ScaleDownStabilized
      status: "True"
      type: AbleToScale
    - lastTransitionTime: "2025-05-10T15:08:56Z"
      message: the HPA was able to successfully calculate a replica count from cpu
        resource utilization (percentage of request)
      reason: ValidMetricFound
      status: "True"
      type: ScalingActive
    - lastTransitionTime: "2025-05-10T15:08:56Z"
      message: the desired count is within the acceptable range
      reason: DesiredWithinRange
      status: "False"
      type: ScalingLimited
    currentMetrics:
    - resource:
        current:
          averageUtilization: 0
          averageValue: "0"
        name: cpu
      type: Resource
    currentReplicas: 1
    desiredReplicas: 1
kind: List
metadata:
  resourceVersion: ""
Pod 부하 발생
# 터미널 1번
while true; do kubectl get hpa; kubectl top pods; sleep 1s; done

# 터미널 2번
kubectl run -i --tty load-generator --rm --image=busybox:1.28 --restart=Never -- /bin/sh -c "while true; do wget -q -O- http://hpa-nginx.default.svc.cluster.local; done"

# 실습 종료 후 리소스 삭제
kubectl delete hpa --all
kubectl delete -f hpa-nginx.yaml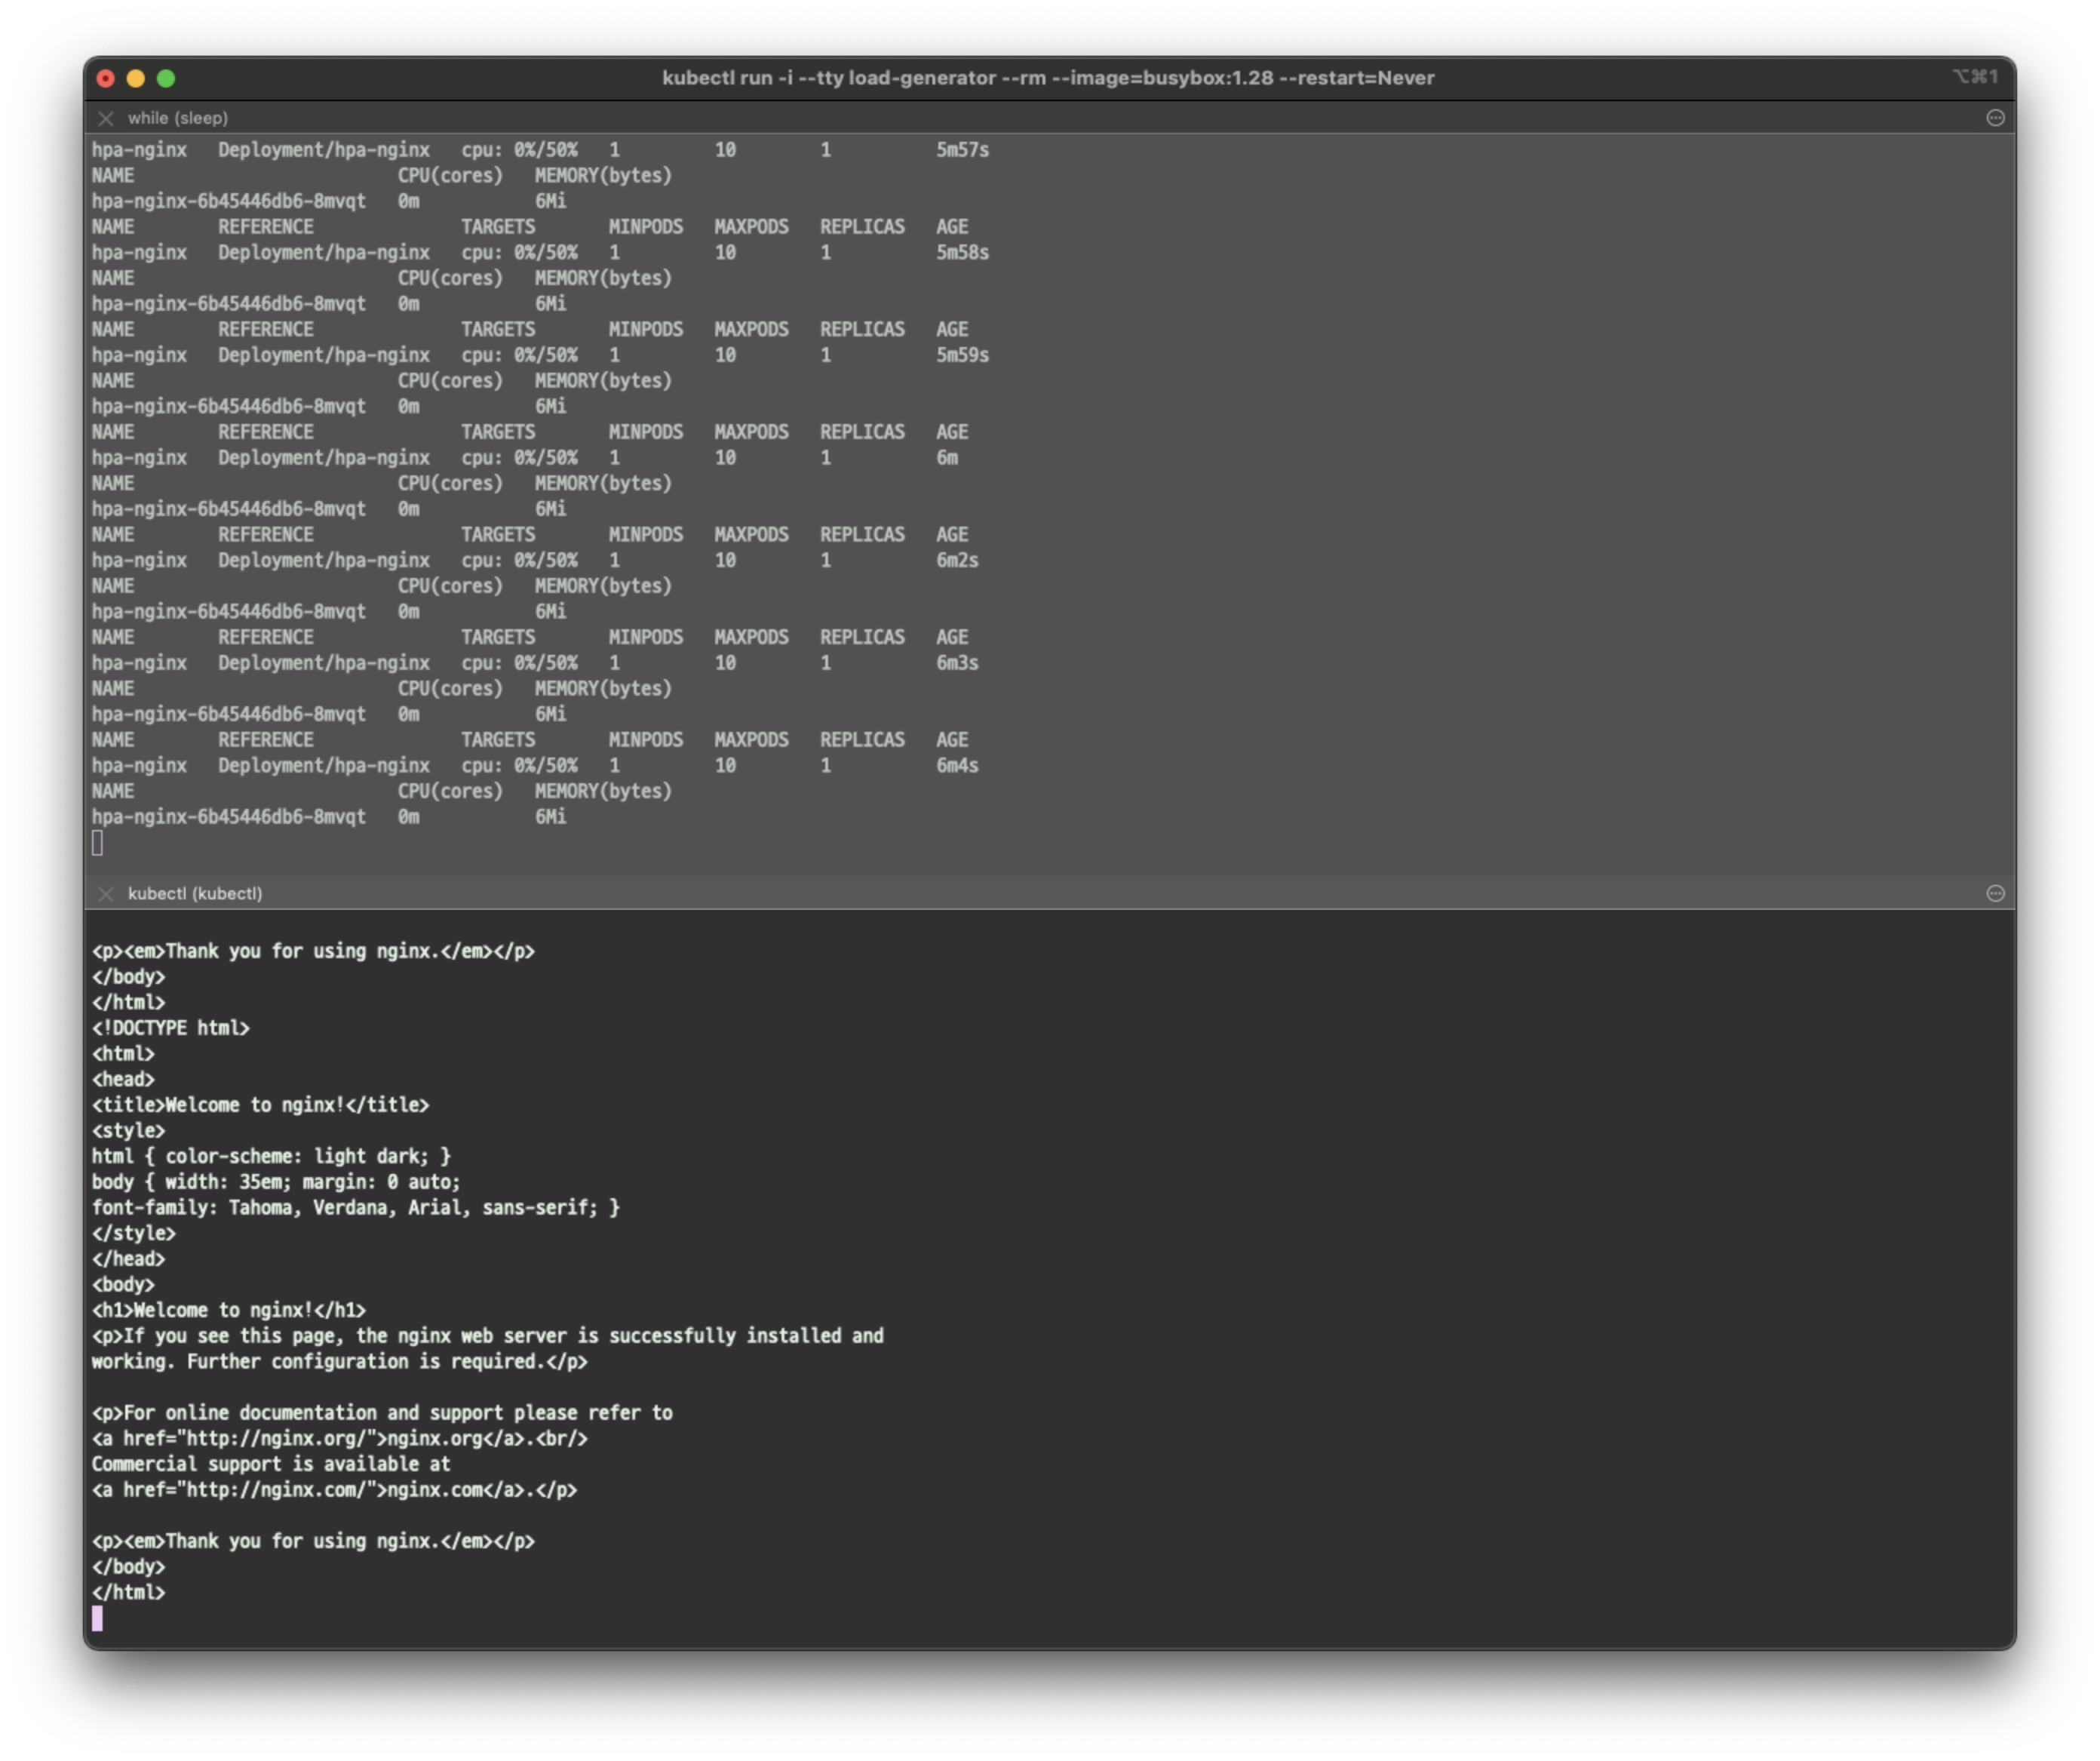
VPA
수직 스케일링 (VPA, Vertical Pod Autoscaling)
- Pod 의 리소스 요청값(Request) 을 자동으로 조정하는 기능
- 적용 대상 : Request (CPU, Memory)
- Pod 의 개수를 늘리는 HPA 와 다르게 Pod 의 리소스 크기를 조정
- VPA Recommender 에 의해 최적의 리소스 상태를 찾아서 조정
- 하나의 Deployment 에 HPA, VPA 를 같이 사용할 수 없음 > 충돌 발생
- Kubernetes v1.33 버전 부터는 기본 활성화 상태
- but, kind 는 현재 v1.32 까지만 사용가능하므로 별도 controller 설치 필요
- 기본 구성
apiVersion: autoscaling.k8s.io/v1
kind: VerticalPodAutoscaler
metadata:
  name: my-app-vpa
spec:
  targetRef:                   # Scale 대상
    apiVersion: apps/v1
    kind: Deployment
    name: my-app               # Deployment 명칭
  updatePolicy:
    updateMode: "Auto"         # VPA Recommender 에 의해 자동 조정 활성화
  resourcePolicy:
    containerPolicies:
      - containerName: my-app-container # Container 명칭 "*" 사용 가능
        minAllowed:            # 컨테이너가 할당받을 수 있는 최소 리소스
          cpu: "200m"
          memory: "512Mi"
        maxAllowed:            # 컨테이너가 할당받을 수 있는 최대 리소스
          cpu: "2"
memory: "2Gi"- VPA 배포
# EKS Workshop 소스 사용
git clone https://github.com/kubernetes/autoscaler.git

# VPA 배포
cd autoscaler/vertical-pod-autoscaler/
./hack/vpa-up.sh

# VPA Controller 확인
kubectl get pods -n kube-system | grep vpa

# VPA 제거
./hack/vpa-down.sh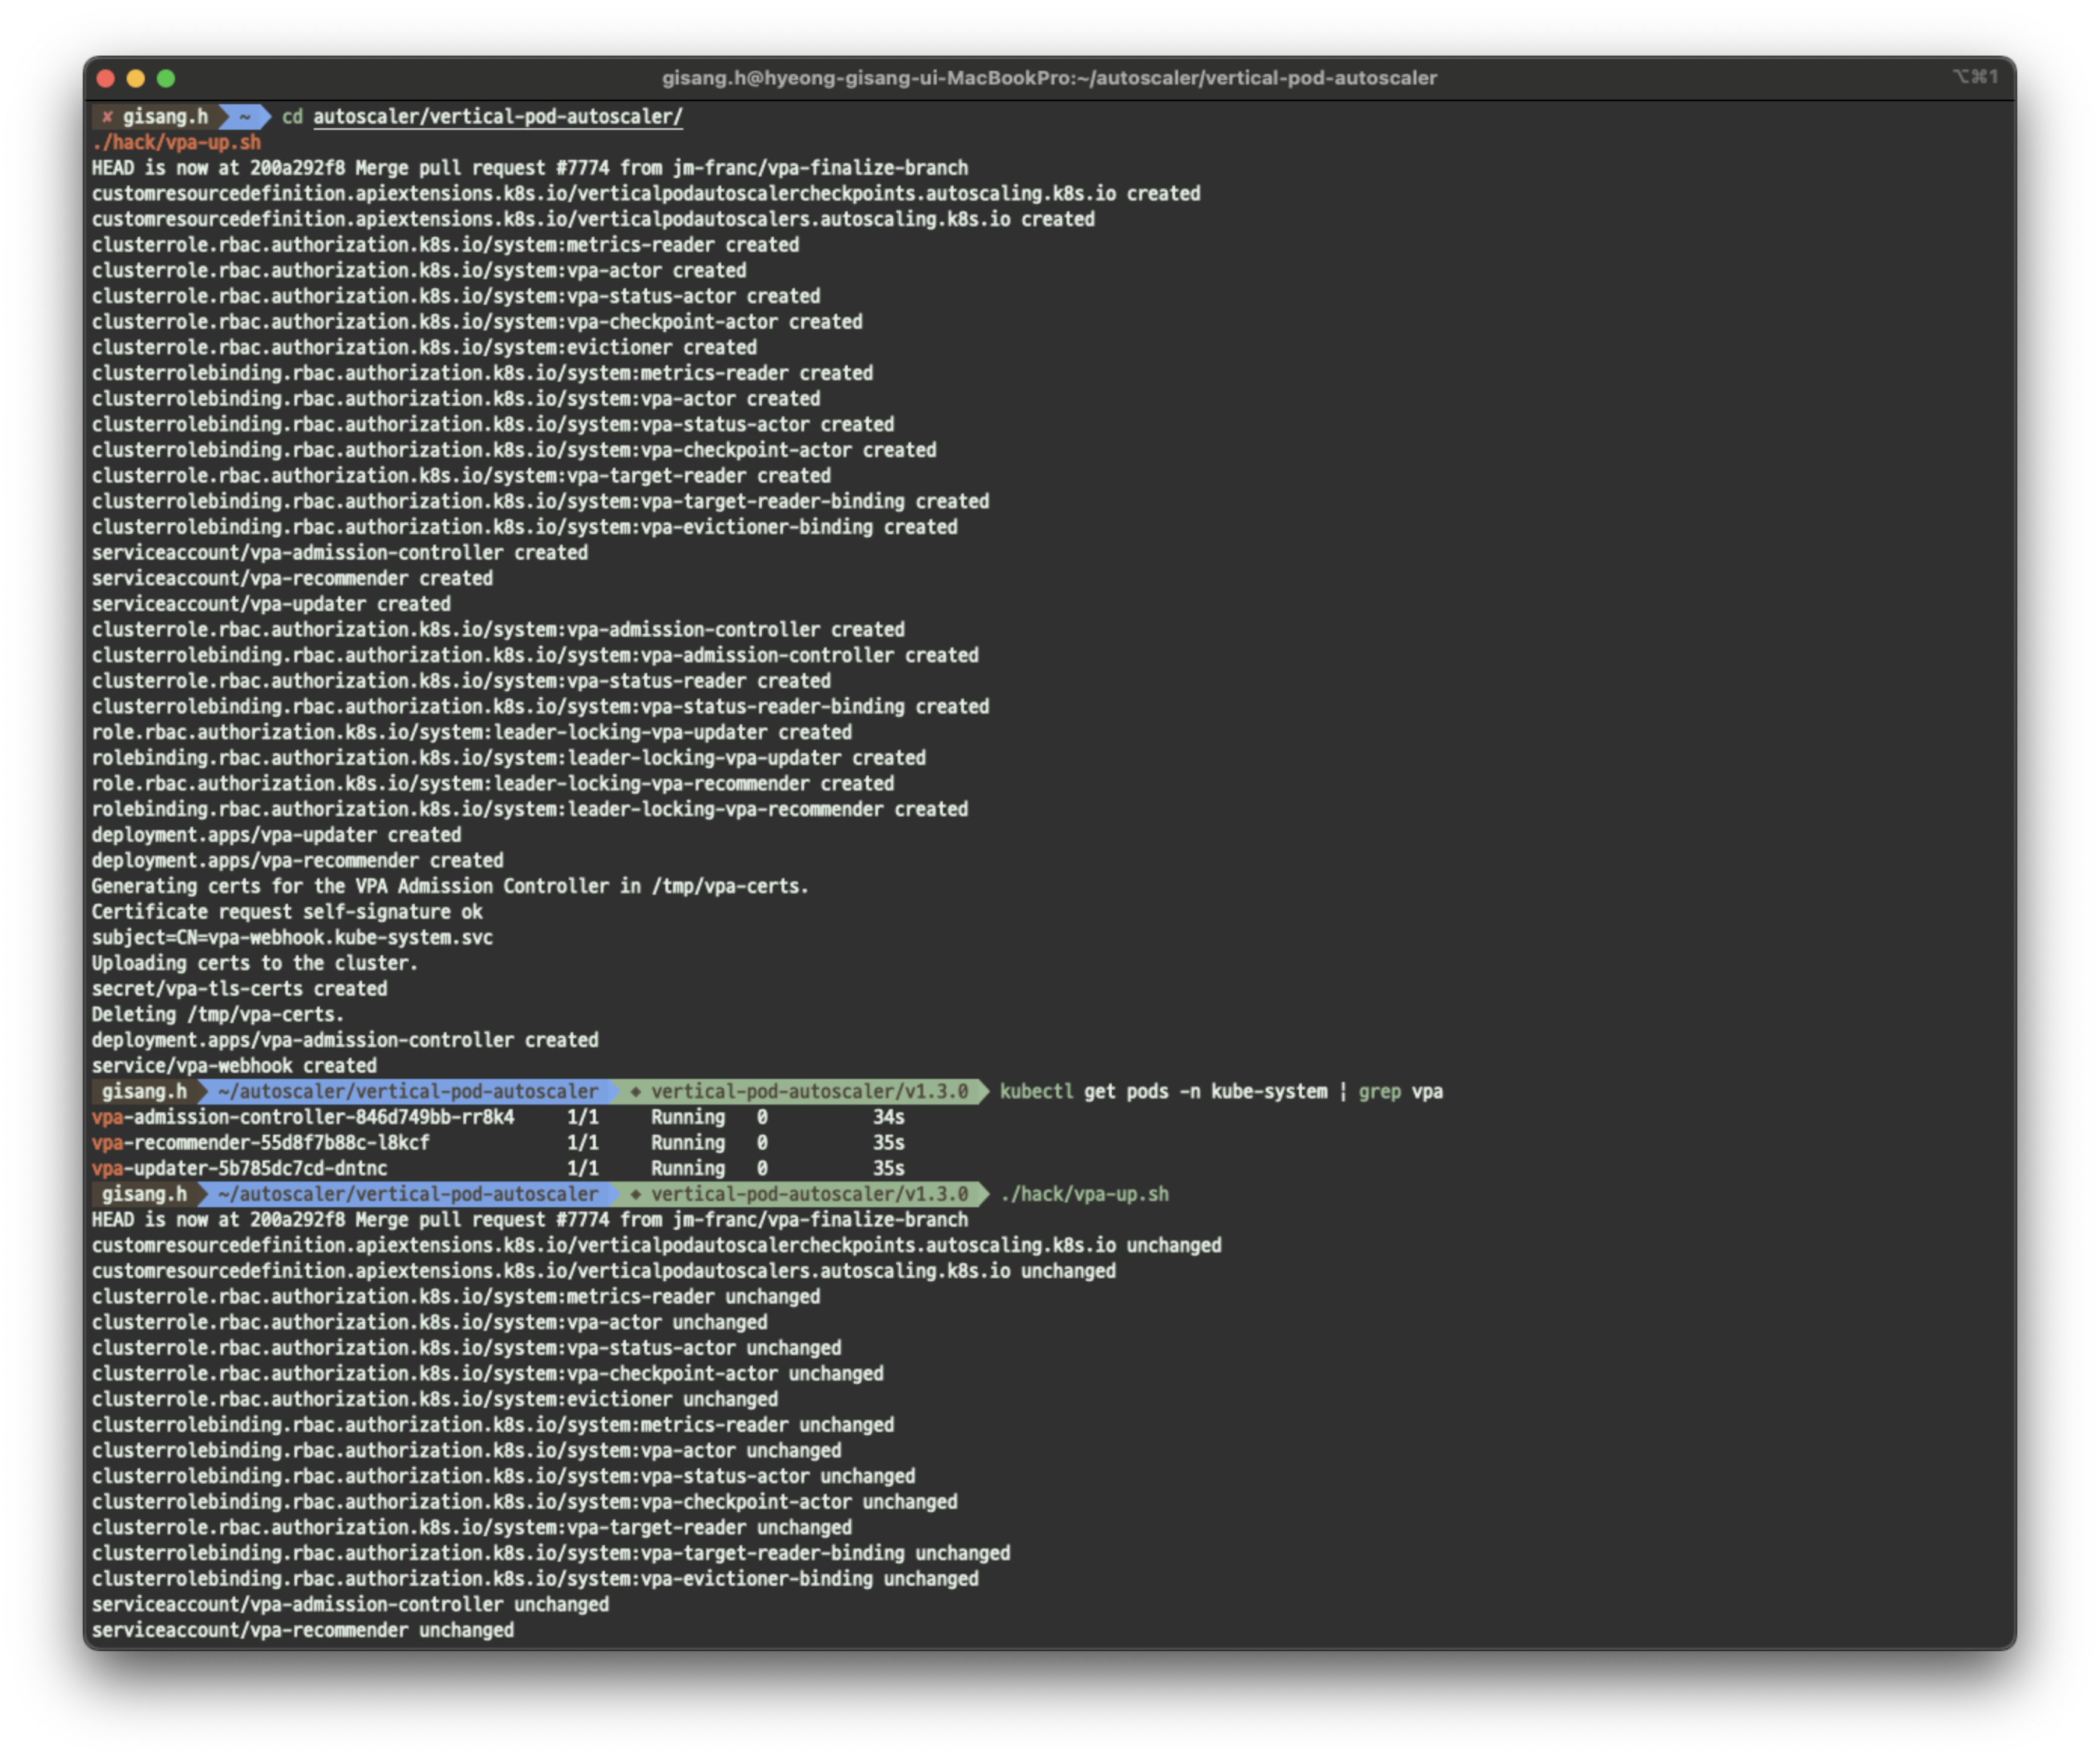
- VPA 테스트
- 0.1 cpu 를 요청한 2개 Pod 배포 (실제 사용량보다 부족한 상태)
apiVersion: "autoscaling.k8s.io/v1"
kind: VerticalPodAutoscaler
metadata:
  name: hamster-vpa
spec:
  targetRef:
    apiVersion: "apps/v1"
    kind: Deployment
    name: hamster
  resourcePolicy:
    containerPolicies:
      - containerName: '*'
        minAllowed:
          cpu: 100m
          memory: 50Mi
        maxAllowed:
          cpu: 1
          memory: 500Mi
        controlledResources: ["cpu", "memory"]
---
apiVersion: apps/v1
kind: Deployment
metadata:
  name: hamster
spec:
  selector:
    matchLabels:
      app: hamster
  replicas: 2
  template:
    metadata:
      labels:
        app: hamster
    spec:
      securityContext:
        runAsNonRoot: true
        runAsUser: 65534 # nobody
      containers:
        - name: hamster
          image: registry.k8s.io/ubuntu-slim:0.14
          resources:
            requests:
              cpu: 100m
              memory: 50Mi
          command: ["/bin/sh"]
          args:
            - "-c"
            - "while true; do timeout 0.5s yes >/dev/null; sleep 0.5s; done"
# 터미널 1번
while true;
do date "+%Y-%m-%d %H:%m:%S";
kubectl get pod -l app=hamster;
kubectl get vpa;
kubectl describe pod | grep "Requests:" -A2;
echo "==============";
sleep 5s;
done
# 터미널 2번
kubectl apply -f examples/hamster.yaml
# 자원 삭제
kubectl delete -f examples/hamster.yaml
CA, KEDA
CA (Cluster Autoscaler)
- Cluster Autoscaler
- 쿠버네티스 클러스터에서 노드 수를 자동으로 확장, 축소하는 도구
- HPA, VPA 는 Pod 단에서의 동작이지만, CA 는 워커 노드 단에서의 동작
- 클라우드 환경에서 사용되며 파드를 배포할 노드의 리소스가 부족해지면 노드를 자동으로 확장
- Karpenter
- CA 와 동일하게 쿠버네티스 노드 수를 자동으로 확장, 축소하는 도구
- CA 와는 다르게 Node 의 크기까지 자동으로 변경 (HPA + VPA 기능)
- CA 에 비해 노드의 빠른 확장 및 축소 가능
KEDA (Kubernetes Event-Driven Autoscaler)
- 기존 HPA(Horizontal Pod Autoscaler)는 리소스(CPU, Memory) 메트릭 기반 스케일링
- KEDA 는 이벤트 기반의 Autoscaler
- HPA 와 함께 사용하여 이벤트 기반으로 유연하게 확장 가능
- ex) 특정 시간대에 미리 확장
애플리케이션 변수 관리
ConfigMap
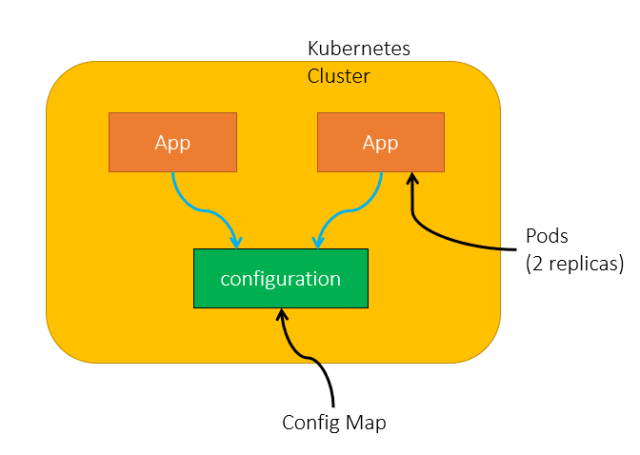
- Kubernetes 애플리케이션의 구성 파일이나 환경 설정을 Key-Value 형태로 저장하고 관리
- 애플리케이션의 설정 정보를 외부에서 관리하고 Pod 와 컨테이너에서 참조
- 주요 사용 용도
- 애플리케이션 설정 관리
- 애플리케이션 구성 정보 (DB URL, 변수 등)을 ConfigMap 에 저장하여 Pod 환경 변수나 파일로 사용
- 애플리케이션 환경에 맞는 설정 값 변경
- 애플리케이션을 재빌드 하지 않고 설정 값 변경
- DEV, STG, PRD 환경에 따라 각각 다른 파일 구성으로 관리 목적
- 애플리케이션 설정 관리
- 기본 구성
# ConfigMap 샘플 구성
apiVersion: v1
kind: ConfigMap
metadata:
  name: my-config # ConfigMap 명칭
data:
  key1: value1    # Key : Value 형태 값 주입
  key2: value2
# ConfigMap 사용 예시
apiVersion: v1
kind: Pod
metadata:
name: my-app
spec:
containers:
- name: my-container
image: my-image
env:
- name: MY_CONFIG_KEY # 컨테이너에서 사용할 변수 Key 값
valueFrom:
configMapKeyRef:
name: my-config # 사용할 ConfigMap의 이름
key: key1 # ConfigMap 내의 키 -> 값: value1
ConfigMap 기본 활용
cat <<EOF | kubectl apply -f -
apiVersion: v1
kind: ConfigMap
metadata:
  name: mysql
data:
  DBNAME: mydatabase
---
apiVersion: v1
kind: Pod
metadata:
  name: nginx-configmap
spec:
  containers:
  - image: nginx
    name: nginx-configmap
    env:
    - name: DB
      valueFrom:
        configMapKeyRef:
          name: mysql
          key: DBNAME
EOF

# 오브젝트 확인
kubectl get cm,pod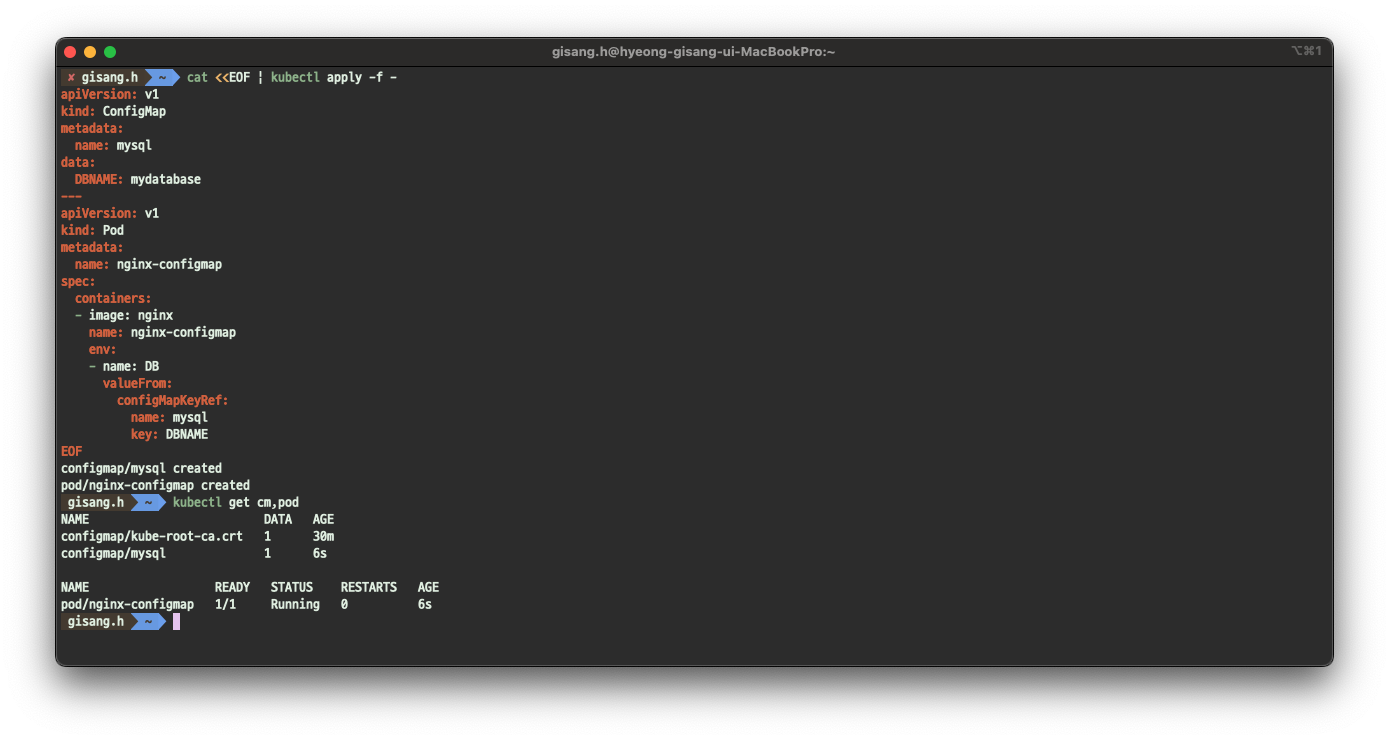
# 상세 정보 조회
kubectl describe cm mysql
kubectl describe pod nginx-configmap
# pod 내부 변수 확인
kubectl exec -it nginx-configmap -- /bin/bash -c env
...
DB=mydatabase
...

# 리소스 삭제
kubectl delete pod --all
kubectl delete cm nginx-configmap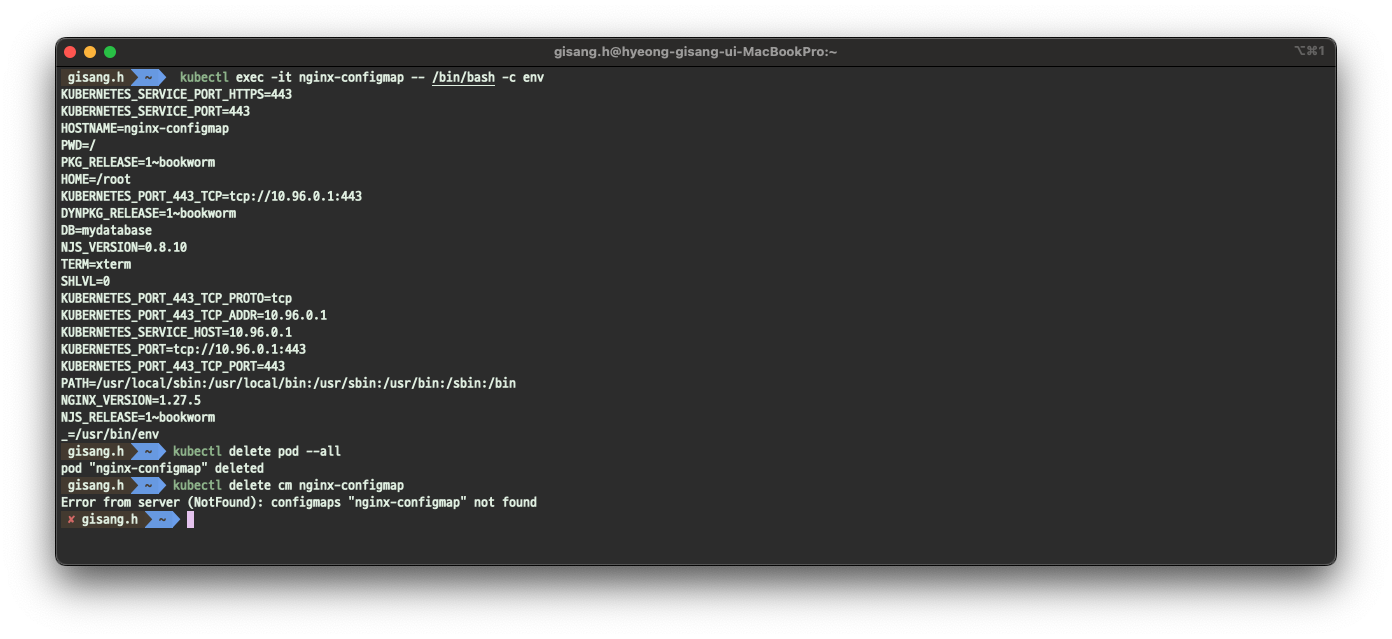
ConfigMap으로 설정 파일 관리
# 테스트 파일 생성
cat << EOF >> config-deploy.yaml
apiVersion: apps/v1
kind: Deployment
metadata:
  name: nginx-configmap-deploy
spec:
  replicas: 2
  selector:
    matchLabels:
      app: nginx-configmap
  template:
    metadata:
      labels:
        app: nginx-configmap
    spec:
      containers:
      - name: nginx
        image: nginx
        ports:
        - containerPort: 80
        volumeMounts:
        - name: config-volume
          mountPath: /etc/nginx/nginx.conf
          subPath: nginx.conf
      volumes:
      - name: config-volume
        configMap:
          name: nginx-config
---
apiVersion: v1
kind: Service
metadata:
  name: nginx-service
spec:
  selector:
    app: nginx-configmap
  ports:
    - protocol: TCP
      port: 80
      targetPort: 80
      nodePort: 31001
  type: NodePort
EOF

cat << EOF >> configmap.yaml
apiVersion: v1
kind: ConfigMap
metadata:
  name: nginx-config
data:
  nginx.conf: |
    events {}
    http {
        server {
            listen 80;
            location / {
                return 200 'Hello from nginx configmap!';
            }
        }
    }
EOF
- 리소스 배포
kubectl apply -f configmap.yaml -f config-deploy.yaml

#
kubectl get cm,deploy,pod
kubectl describe deploy
...
    Mounts:
      /etc/nginx/nginx.conf from config-volume (rw,path="nginx.conf")
  Volumes:
   config-volume:
    Type:          ConfigMap (a volume populated by a ConfigMap)
    Name:          nginx-config
    Optional:      false
...

# Nginx 접속
open http://localhost:31001

# Nginx ConfigMap 변경
vim configmap.yaml
...
return 200 'Modify from nginx configmap!';
...

#
kubectl apply -f configmap.yaml

# pod 재시작
kubectl rollout restart deploy nginx-configmap-deploy

# 리소스 삭제
kubectl delete -f configmap.yaml -f config-deploy.yaml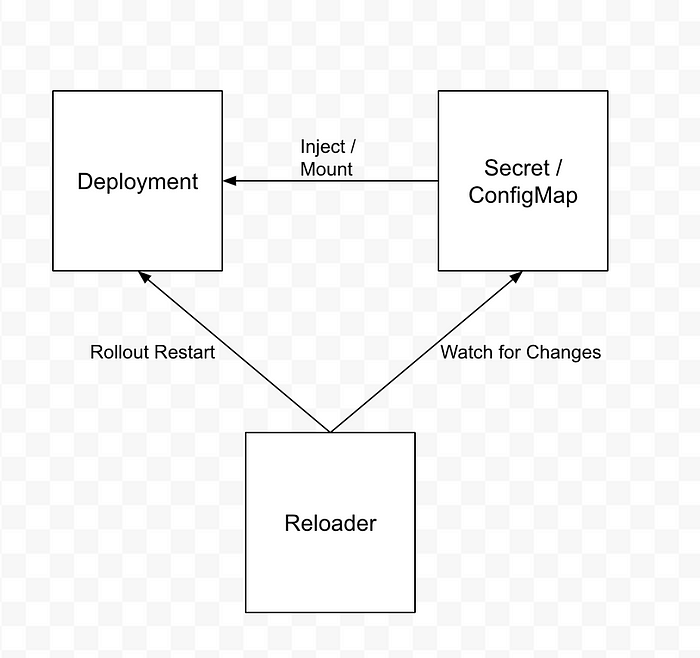
- ConfigMap 변경 시 Pod 수동 재배포가 필요 → 비효율적
- ConfigMap, Secret 의 변동 사항을 주기적으로 확인해서 자동으로 Rollout 을 해주는 오픈소스 도구
Secret

- Kubernetes 에서 민감 정보를 안전하게 관리하는 객체 (비밀번호, 토큰, SSH 키 등)
- ConfigMap 과 달리 Base64 로 인코딩된 형태로 데이터 저장
- → Base64 는 암호화인가??
- Secret 파일에 Base64 로 인코딩된 값이 아니면 사용할 수 없음
- 주요 사용 용도
- 비밀번호, API 키 등의 민감정보 저장
- ConfigMap 과 동일하게 Pod 의 환경 변수나 파일로 주입 가능
- 기본 구성
# Secret 샘플
apiVersion: v1
kind: Secret
metadata:
  name: my-secret
type: Opaque
data:
  username: bXl1c2Vy  # base64로 인코딩된 값
  password: bXlwYXNzd29yZA==  # base64로 인코딩된 값
# Secret 사용 예시
apiVersion: v1
kind: Pod
metadata:
name: my-app
spec:
containers:
- name: my-container
image: my-image
env:
- name: DB_USER # Container 에서 사용할 변수명
valueFrom:
secretKeyRef:
name: my-secret # 사용할 Secret의 이름
key: username # Secret 내의 키
- name: DB_PASSWORD
valueFrom:
secretKeyRef:
name: my-secret # 사용할 Secret의 이름
key: password # Secret 내의 키
...
# 마운트 방법
volumeMounts:
- name: secret-volume # Volume 명칭
mountPath: /etc/secrets # 컨테이너 내부 마운트 위치
volumes:
- name: secret-volume # Volume 명칭
secret:
secretName: my-secret # 사용할 Secret의 이름
Secret 기본 활용
cat <<EOF | kubectl apply -f -
apiVersion: v1
kind: Secret
metadata:
  name: secret-test
type: Opaque
data:
  username: YWRtaW4=  # 'admin'을 base64 인코딩한 값
  password: cGFzc3dvcmQ=  # 'password'를 base64 인코딩한 값
EOF

# Base64 인코딩 방법
echo -n 'admin' | base64
echo -n 'password' | base64
#
cat <<EOF | kubectl apply -f -
apiVersion: v1
kind: Pod
metadata:
  name: secret-pod
spec:
  containers:
  - name: nginx
    image: nginx
    env:
    - name: DB_USER
      valueFrom:
        secretKeyRef:
          name: secret-test
          key: username
    - name: DB_PASS
      valueFrom:
        secretKeyRef:
          name: secret-test
          key: password
EOF

#
kubectl get pod,secret

# 상세 정보 조회
kubectl describe secret secret-test
kubectl describe pod secret-pod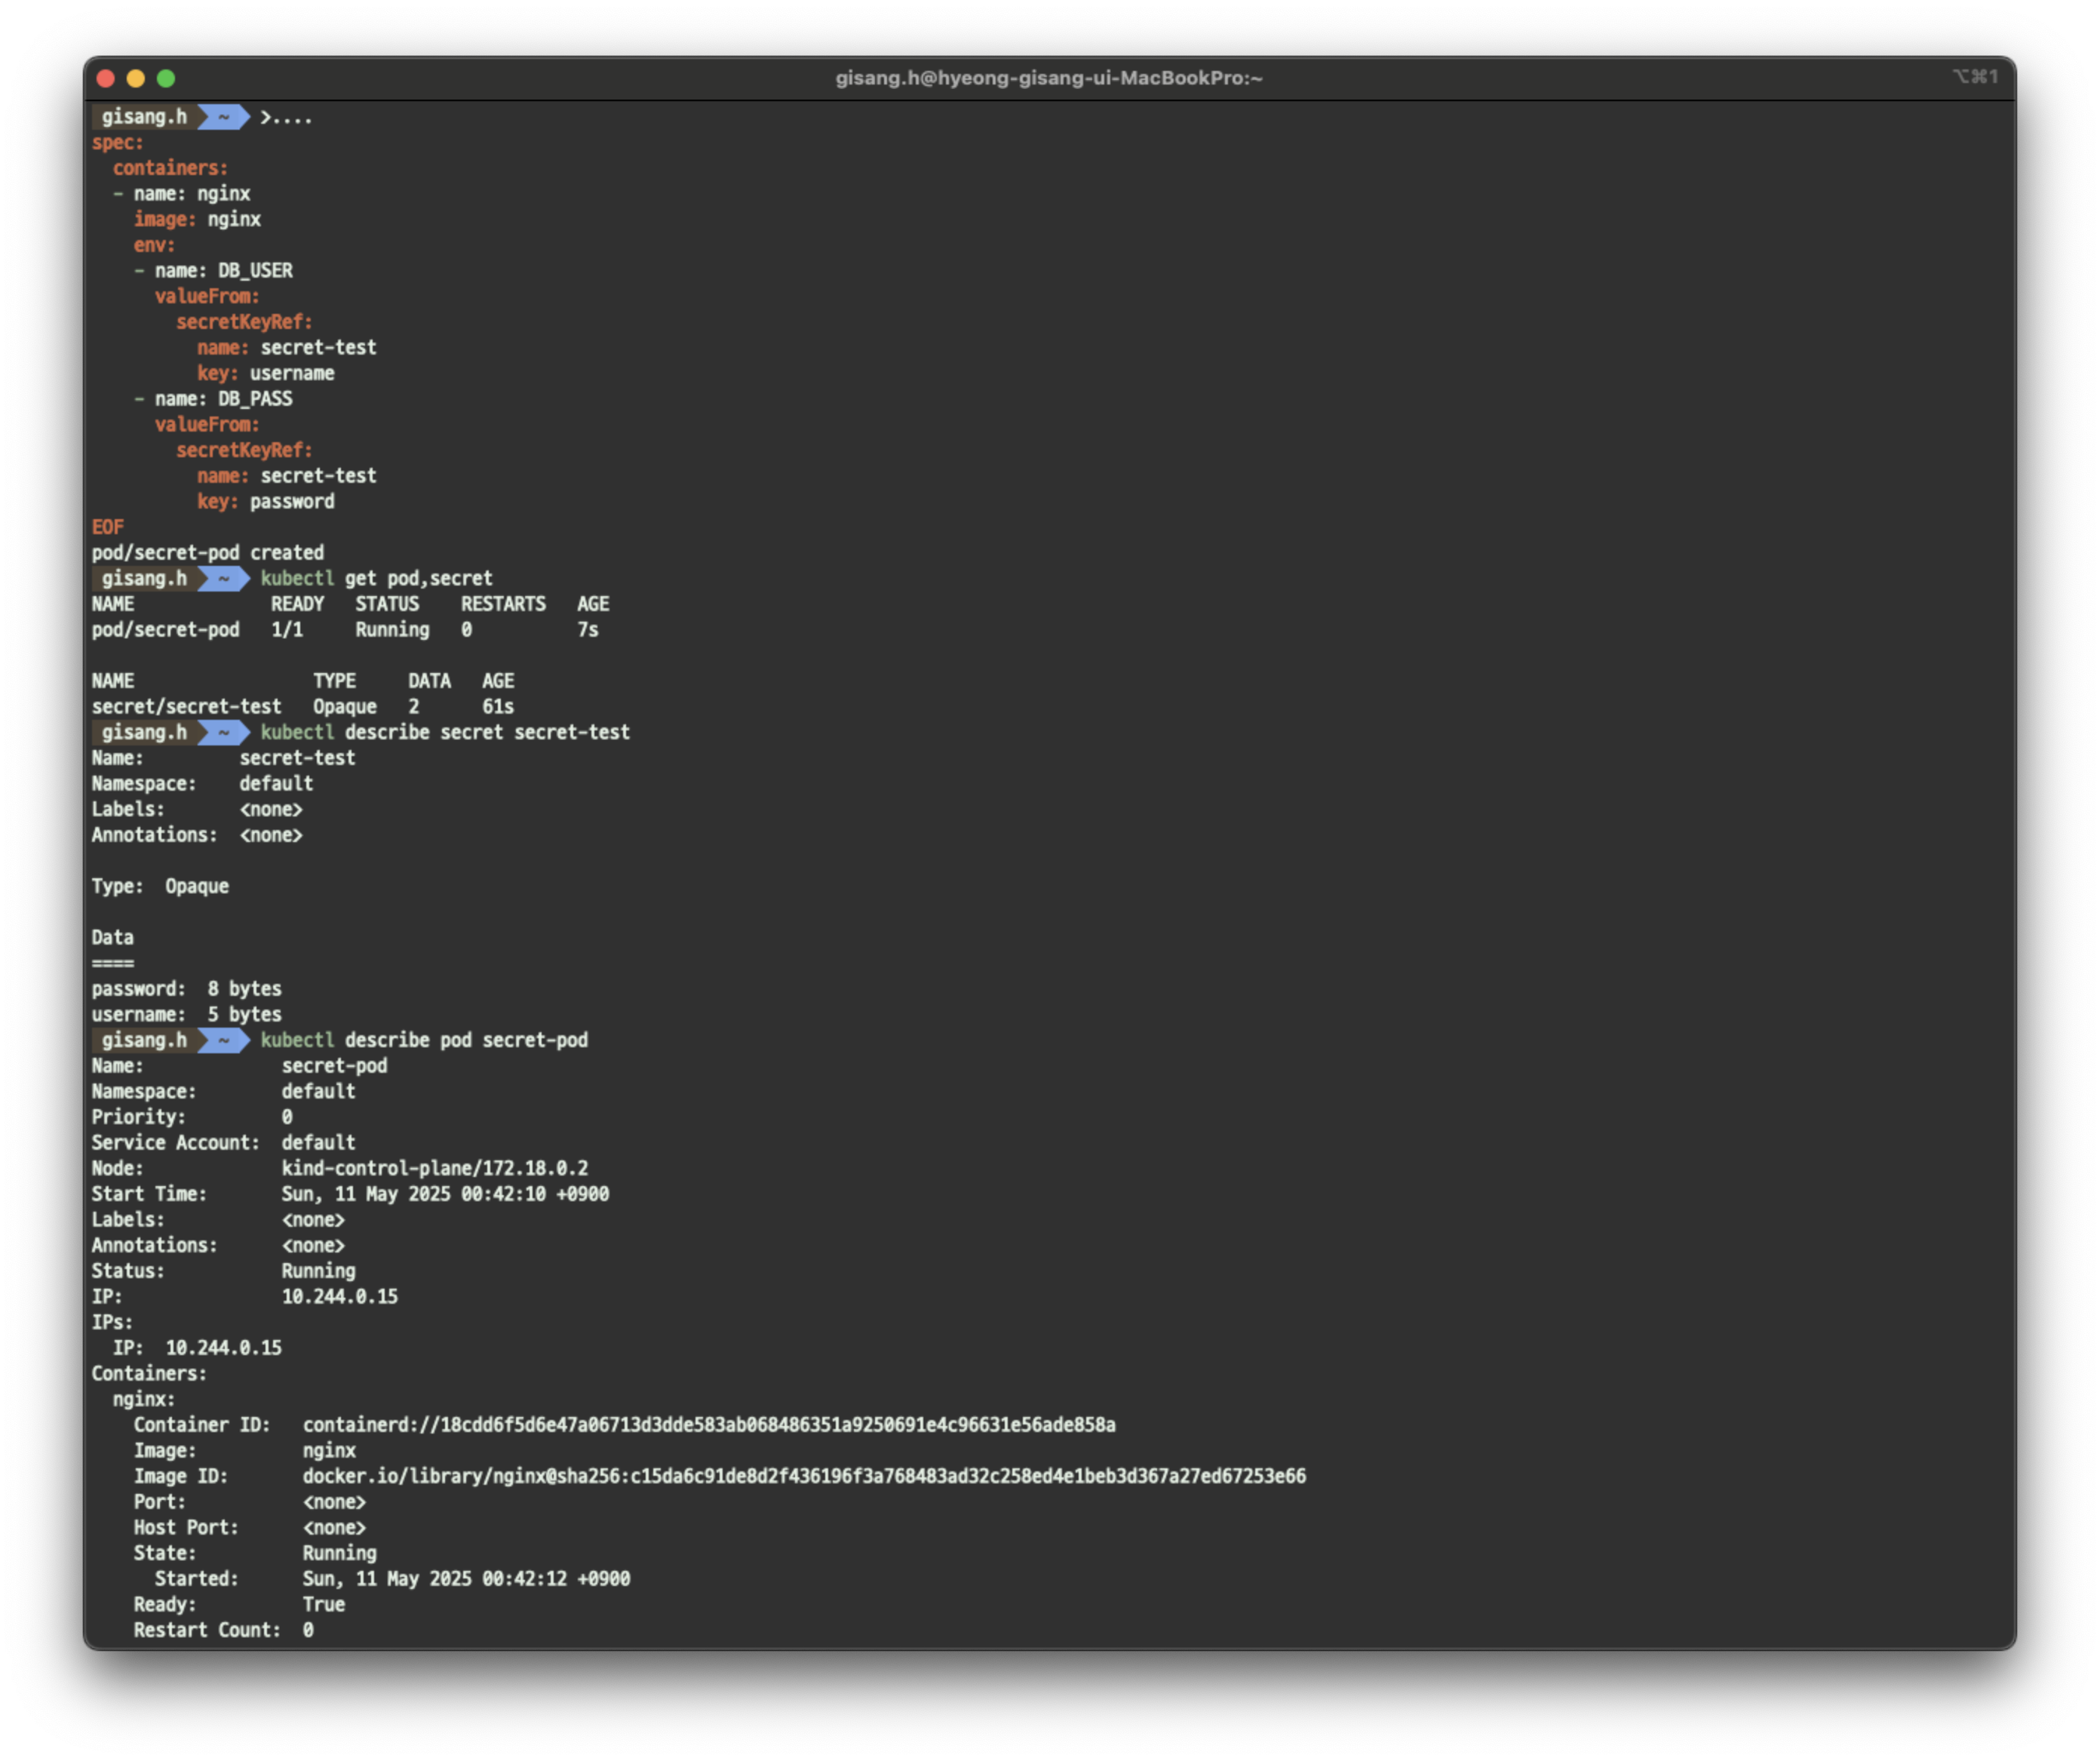
# pod 내부 변수 확인
kubectl exec -it secret-pod -- /bin/bash -c env
...
DB_USER=admin
DB_PASS=password
...

# 리소스 삭제
kubectl delete pod --all
kubectl delete secret secret-test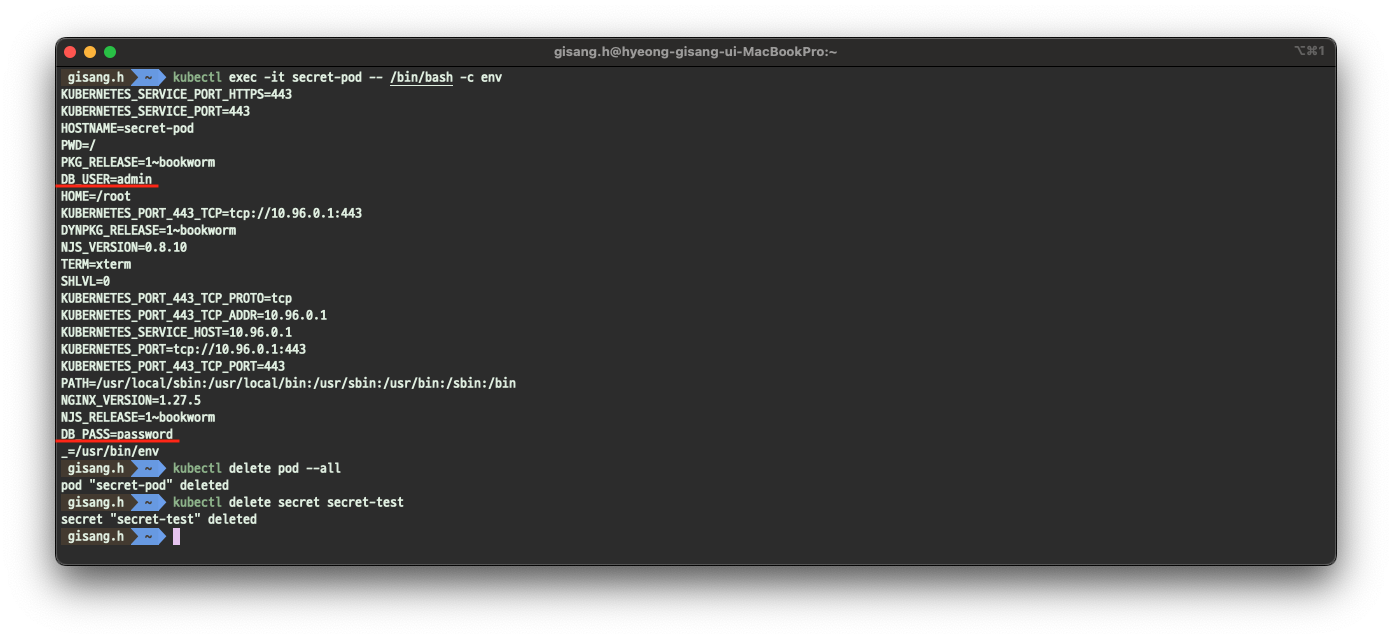
- Secret 을 관리하는 다양한 도구
- ASCP (AWS Secret Store CSI Driver) - AWS Secret Manager 활용
- HashiCorp Vault
- Sealed Secret - OSS
참고) Sealed Secret
- K8S Secret 을 암호화할 수 있는 OSS 도구
- 기존 Base64 로 인코딩 되어 저장하는 Secret 이 아닌 암호화 되어 저장
- Code Repository (Git) 에 암호화된 Secret 이 올라가기 때문에, GitOps Flow 를 그대로 사용할 수 있는 장점이 있음
- Client Side(암호화) - Server Side (복호화)
# Mac Brew 설치 (Client-Side)
brew install kubeseal

# Server-Side 설치 - SealedSecret Controller
helm repo add sealed-secrets https://bitnami-labs.github.io/sealed-secrets
helm install my-release sealed-secrets/sealed-secrets

# SealedSecret Controller 조회
kubectl get pods -l app.kubernetes.io/name=sealed-secrets

# Secret 생성
kubectl create secret generic mysecret \
  --from-literal hello=world \
  --dry-run=client \
  -o yaml > mysecret.yaml

#
cat mysecret.yaml

# base64 디코딩
grep 'hello:' mysecret.yaml | awk '{print $2}' | base64 --decode

# Sealed Secret 생성
cat mysecret.yaml | \
  kubeseal \
   --controller-name my-release-sealed-secrets \
   --controller-namespace default -o yaml > mysealed-secret.yaml

# Sealed Secret 암호화 적용 확인
cat mysealed-secret.yaml
grep 'hello:' mysealed-secret.yaml | awk '{print $2}' | base64 --decode

#
kubectl apply -f mysealed-secret.yaml
kubectl get secret

# secret 확인
kubectl get secret mysecret -o json
kubectl get secret mysecret -o jsonpath="{.data.hello}" | base64 -d
'끄적끄적 > IT공부' 카테고리의 다른 글
| [IT공부]Kubernetes 소개 & Kubernetes 기본 활용 - 1 (0) | 2025.04.27 |
|---|---|
| [IT공부]Docker-Docker Network (1) | 2025.04.17 |
